Tuesday, May 26, 2009

The Fine Art of Chicken Hypnosis

My oldest loves to entertain little kids. And what could possibly be more entertaining to a kid (of any age) that to hypnotize a chicken? I assure you that the chicken in this photo is quite alright. She's just taking a break from doing what chickens normally do. My eldest accomplishes this by setting the chicken on the ground (I'm sure the hard part is catching the chicken) and then she draws a line on the ground starting at the bird's head and going around to it's side. She repeats this a few times. She can then let go of the chicken and what you have is one hypnotized chicken and a crowd full of elated children. Great party trick! I promise that the chicken snaps out of it with absolutely no damage whatsoever. Well, maybe a wounded ego, if it could remember...
Other people have different ways of hypnotizing chickens that are just as effective. (They must be pretty easy to hypnotize!) Bird brains! *Disclaimer* (The girl you see in this photo is a professional and you should not attempt to try this at home.)

Sunday, May 24, 2009

Corn all in...check!

Ted finished planting the last of the corn today. Whoot! We celebrated by him taking the evening off and going out to dinner as a family...a very rare and special occasion these days. We ate at Aladdin Cafe (my favorite, and if you're ever in Lawrence, you simply must go there! Their Schwarma is out of this world delicious...but I digress...).
The next thing Ted has to do is get some spraying done and then get about 1000 acres of beans planted. We won't even begin talking sunflowers...yet.

This is one of the sprayers. I like it because it has my maiden name printed right on the front: "Hagee," only they've misspelled it "Hagie." Oh well, the hubby just can't keep away from things (or people) with that name.

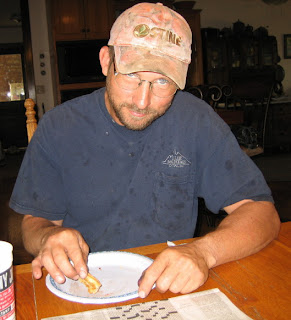
This is the look I get when I say things like: "Honey, now that you have an evening off, I have a list of about a thousand things I want you to get done before tomorrow morning when you go back to work...okay?"

Just in case you are wondering, during planting season, Ted sets the alarm for 4 am, may or may not hit "snooze" until 4:30, work all day and get home between 9:30 and 10 pm. That's why an evening off is such a BIG DEAL!!!

Tomorrow, when the rest of the USA will be laying flowers on graves or maybe grilling a hot dog or a burger with family and friends, Ted will be working. As much as all of that spring rain got him so far behind in the field, I could really use for him to have a rain day right now!

Thursday, May 21, 2009

Soap Making: 101

I gave a newspaper interview this morning on soap making. It got me thinking that maybe I would post the photos from a couple of years ago when I taught Sidney how to make soap. I was always a little wigged out about having my kids around the caustic chemicals it takes to make soap, but I decided that she was finally responsible enough to pay attention to all of the safety precautions that I would give her without too much eye rolling on her behalf.


Soap making is really just chemistry. Without boring you with all of the formulations, I'll just try to describe what the process is. I use fatty acids (various types of fat that all lend different properties to a bar of soap), water, and sodium hydroxide (a.k.a. lye). See, I really want to go on and on about chemical compounds right here, like the fact that sodium potassium makes liquid soap and how you achieve a clear bar as opposed to opaque, but I'll stop myself...really!) This type of soap making is called "cold processing," although a great amount of heat is actually involved.
The first step in the process is to measure out the various fats into a large stainless steel pot. I had Sid weigh out all of the ingredients on a scale.

Next, she needs to measure out the lye. Lye is an alkali and very caustic. She also will measure out a certain amount of water into a pitcher that will soon be combined with the lye.


Safety gear is a must. Gloves to protect hands from a nasty chemical burn, goggles because you only have one set of eyes, and a mask because once the water is poured into the lye, it becomes very volatile and can burn your lungs. It is choking to breathe these vapors. I won't tell you how I know that. Let's just say, you need to trust me on this!


The water is poured into the lye and stirred until the chunks of lye are dissolved. I forgot to mention that once water and lye combine, the temperature of the mixture shoots up to just under the boiling point. It gets very hot very fast. Notice that I have this sitting on the floor. That is for a couple of reasons. I want the lye water to cool down faster and concrete is nice and cool...and I don't want it to get spilled.


Back to the fat. I have her melt the fat on a stove until it reaches a certain temperature. The temperature varies depending on the recipe that I'm using, but I've done this so much that I can always tell just by looking when it is just right.


After the fat is melted and at the right temp, I pour in the lye water...that has also cooled to a certain temperature. I used to use thermometers for everything, now I rely on timing. (I've done this for about 17 years now.)


After the lye water is added to the melted fat, it begins to change color and will thicken just slightly. Here is where stirring comes into play. Lots and lots of stirring.


So much stirring, that I had the hubby rig me up one of these! It's just a jig that sits atop the pot that I can put a locking drill with a paint stirrer attached to do the work for me. (Otherwise, I'd be here stirring for hours!)


After much stirring, "fillers" can be added to the soap. That means anything that you want to add to make the soap anything other than just "plain soap." Oatmeal, dried lavender flowers, essential oils for a great smell, and color (ultramarine pigments) if you like...lots of different things...but nothing fresh like fruit of vegetables. If it will rot, it will also rot encased in a bar of soap. When the soap reaches "trace," (that is the point, as in this picture, where you can see the trace of a spoon that went through the soap) it is ready to pour into a mold.


I make 12 pound batches of soap and pour them into a butcher paper lined oak box. This soap was a bit past the trace point, but I got so carried away snapping pictures and teaching that it was a bit thick. It happens...not a big deal here as it was still pourable.


Soap in a box!


A lid is put on the box, and then a nice thick layer of foam insulation is put on top. The insulation allows the soap to actually heat up further (chemical process...molecules slamming together...I'll shut up). The soap will go through a "gel phase." This means that it will actually become clear and amber color. It will be very hot. This gel phase allows the soap to be very neutral (chemical-wise) when it comes out of the box. The goal in soap-making, is to have the right amount of molecules all combine and turn into something completely different...soap! That's why, there is not actually lye in a bar of soap. All of those molecules have turned into soap. No lye! (Pun intended.) Some extra fat in a bar of soap is a desired thing, so we soap makers formulate to have a slight excess of fat when finished. This is called "super-fatting" the soap.


A very important part of any task...cleanup! You'd think that you could just add water and get lots of nice suds. Not so! It takes time for the chemical process to happen so all you have right now is caustic soda and fat (thus the gloves). I actually have to use dish soap to clean the equipment!


The next day, I un-mold the soap and cut it into bars. If I wait too long, the soap will get too hard to cut, so I have to do it the next day. It smells wonderful! (This is rosemary patchouli...a favorite.)


Just various kinds of soap that I make. The swirly kind is fun. I will stop now because that's probably already more than you wanted to know. I hope you've enjoyed this little tour of my lab.
-the Farmer's Wife


Tuesday, May 19, 2009

Green Acres...of the wrong stuff!

The boys are finally in the field! They are way behind schedule, but as of right now, better late than never is the motto. I called my honey, to see if I could ride along for a bit...


my chariot awaits! (I love the cushy little "buddy seat" in the tractors.) I did, however, forget to bring my winter parka. I forgot how cold farmers like to keep the cabs. I think it helps them to stay awake...or something...

This is the field Ted is planting today. It is not normally this GREEN before he plants. Since we are so far behind this year (due to all of the rain) we have all of these weeds (in this case, "volunteer" wheat) that got much larger than would be normal. The weeds have been sprayed so that we can no-till the land. This saves the soil from erosion.


The concept of planting is simple: get in the tractor and straddle the line. The line was made by a "marker" that is on a hydraulic arm that leaves a cut in the soil.
This is what the field looks like after the planter goes over it. Lots of nice straight rows of planted seed (in this case...corn).


In reality, the inside of a tractor looks somewhat like the cockpit of an airplane. Buttons, dials, levers, toggles, bells, whistles...


I don't know how one keeps track of it all.


I really wasn't kidding about the bells and whistles. The tractor is constantly making noises that sound like an old arcade game. (All the while, Ted has NPR playing in the background.) One of the buzzers didn't shut off so Ted had to hop out and see what was the matter. He said that this particular "noise" was to let him know that his seed had stopped planting.


These yellow boxes are where the seed is kept.


Ted climbs out of the cab to go check things out. Hmmm...maybe one of those hoses popped off, or something. Looks like something out of a Marvel comic book to me!


Oh, well this is much easier to understand. I'm sure I could figure this out in about two seconds. I'm not afraid of a few thousand wires and hoses...
Ted just giggled a box and the seed fell down. Yep, the exact same approach I would have taken. He is back to planting in no time!


This particular field was full of these:
golf balls! Do we have a budding Tiger Woods in the neighborhood?


I've had enough for today. Ten minutes in a tractor was plenty for me. I wave "goodbye" to my chauffeur and give him a thank you peck.


It's been fun ridin' with you farmer Ted!


Friday, May 15, 2009

Birds of a Feather...


It has been a very wet spring. The wettest I can remember, anyway. It hasn't led for a very productive farming experience. So most days, I've focused the attention of my camera elsewhere. It's simply for the birds!

I've been a "birder" since I was a young child. My mom got me started, as she always used to take us kids, field guide in hand, to drive around a wildlife refuge called Squaw creek in Mound City, MO. We would look at all kinds of ducks, geese, eagles, etc., and try to identify them. I loved seeing the rare birds that you just didn't see every day: a Belted Kingfisher perhaps. It was an outing that we always enjoyed.

As the wife of someone who grows bird feed, I always am thankful to have a good supply of seed and usually try to keep my feeders full. This year, this little guy got me started taking pictures of them, as well. As I walked past the window, I thought: "What IS that?" Turns out it was a partially albino male Goldfinch. I had never seen one before. I'm glad he stayed long enough for me to get my camera. I have not seen him again!

This is an Indigo Bunting with a White-breasted Nuthatch behind him. I spilled some sunflower seeds on the ground which got them looking in the grass for easy pickings.


The Indigo Bunting has been a regular at the feeder this year.


The Northern Orioles (Baltimore variety) have returned and are feeding like crazy. This one found my feeder before I had a chance to fill it.


I actually have a pair of House wrens using the little log cabin house that I bought a million years ago. (It usually only gets used by tree frogs.) This year, I was vigilant in removing the four or five sticks that they would put in the house everyday (wrens do that as a way to discourage other wrens from nesting) and my hard work paid off...a nesting pair! Yeah!


These Mockingbirds showed up early to polish off the dried up crab apples under my tree. They now have a nest in a Blue spruce in the yard.


Rose-breasted Grosbeaks also show up around this time. This is a male and female. They are funny birds as they will just sit on the feeder for a long time. Almost like they are too lazy or don't want to waste their energy in flying back and forth for their meal. They will just sit until they eat their fill.


Summer would not be complete without these guys (and gals). Goldfinches are everywhere! Lots and lots of them! I've had some House finches and Purple finches, too, but haven't been quick enough with the camera. I'll keep trying. I'm sure Hummingbird pictures will be coming soon, too. They showed up several weeks ago, but now they are eating at the Oriole feeder instead of the one on my porch. No matter. The Orioles will stop feeding soon (I don't know why, but they always do) and then the Hummers will return to the porch feeder.
I hope you've enjoyed my "bird tour." I love birds and just thought I'd share my love and fascination with you!
(Remember...you can always click on the picture and if it is a larger file size than posted, it will zoom in.)


Tuesday, May 12, 2009

Having a Field Day!

This is the first day Ted has been able to get into the field to plant corn. Right now he is in a race against those clouds in the sky. (The only reason he's out of the tractor is to come over to the car and get his lunch.) Let's all hope it doesn't actually rain today!

Tuesday, May 5, 2009

Guess what the mailman brought?


We received a delivery today. It wasn't unexpected. We've been waiting for quite some time.


Can you guess what's in the package?


Aren't they cute? Baby chicks are always cute! These are barred-rocks.


This is their new home for a couple of weeks...a Rubbermaid container. We keep it in the "nursery." That's what we call the fenced off portion of the chicken coop. We have to keep them separated from the big hens because some of them would not be nice to the babies. They might consider them dinner.


Speaking of hens, this is what they look like when they grow up. We like them because they lay lots of pretty brown eggs, and because they are pretty gentle...as far as chickens go. We can actually lift them up when they are sitting on a nest, collect the eggs, and lay them back in the nesting box without getting pecked.


The babies arrived hungry and very thirsty. This one (I'll call her "Bob" because that's what Callie names all of the chickens) is getting a drink.


This is a fun trick. If you pick up a baby chick and hold it closer to the warming light...


it immediately falls asleep!